Foiling: Mastering the Foiling Board Setup in New Zealand’s Waters

Foiling has rapidly grown in popularity across New Zealand, transforming the way water sports enthusiasts interact with the ocean. From kite foiling to wing foiling and SUP foiling, this exhilarating sport offers a fresh way to glide above the water with speed, agility, and freedom. At the heart of it all is a crucial element that can make or break the experience: the foiling board setup.

The Rise of Foiling in New Zealand
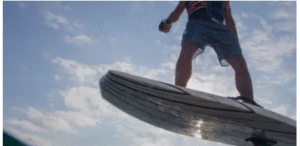
foiling board setupNew Zealand’s expansive coastline, consistent winds, and varied marine environments provide the perfect playground for foiling. From the glassy harbours of the North Island to the wild swells of the South Island, every region offers something unique. Local water sports communities in places like Raglan, Mount Maunganui, and Christchurch have embraced foiling, supported by a growing network of retailers, instructors, and gear manufacturers.

Understanding the Components of a Foiling Board Setup

A complete foiling board setup includes several critical parts: the board, mast, fuselage, front wing, rear stabiliser (or tail wing), and mounting system. Each component plays a unique role and must be matched carefully to the rider’s weight, skill level, and chosen water conditions.

  • Foiling Board: These range from short and agile to long and stable. Wing foilers typically choose shorter, thicker boards for better floatation and control. Beginners may opt for higher-volume boards for easier takeoff and balance.
  • Mast: The mast connects the board to the foil below. Shorter masts are easier to learn, while longer masts are ideal for carving and navigating choppier waters.
  • Front and Rear Wings: The front wing lifts the board, and the rear wing stabilises it. Larger wings offer more lift and are suitable for beginners, whereas smaller wings provide speed and agility for advanced riders.
  • Fuselage: The length of the fuselage affects pitch stability and turning radius. A longer fuselage provides a more stable ride, which is great for learning or wave riding.
  • Mounting System: Most setups utilise a track mount for easy adjustability, enabling riders to fine-tune the mast position according to their personal preference and board size.

Selecting the Right Foiling Board Setup for New Zealand Conditions

New Zealand’s waters present a wide range of conditions, from calm estuaries to strong offshore winds and ocean swells. Tailoring your foiling board setup to suit the environment is vital.

  • Flat Water Foiling (e.g., Lake Taupo, Auckland’s bays): Prioritise stability and control. A high-volume board paired with a long mast and large front wing ensures easier lift and less drag in low-energy waters.
  • Wave Foiling (e.g., Raglan, Gisborne): Choose a shorter board with moderate volume and a responsive wing setup. Speed and manoeuvrability are crucial to match the rhythm of breaking waves.
  • Downwind Foiling (e.g., Cook Strait): Long masts and streamlined wings are key for efficiency over long distances. Lightweight carbon components help with endurance and speed.

Common Setup Mistakes and How to Avoid Them

One of the most common issues riders face is improper weight distribution and foil placement. If the foiling board setup isn’t balanced correctly, it can lead to porpoising (nose diving and rising) or difficulty maintaining lift.

Here are a few pitfalls to watch for:

  • Mast Too Far Back: This causes the nose to lift excessively, making it hard to control.
  • Wings Mismatched to Board Size: A small wing on a large board can feel sluggish, while a large wing on a small board can overpower the rider.
  • Incorrect Mast Height for Skill Level: Beginners often struggle to maintain balance when using tall masts.

To resolve these issues, test different configurations and keep track of the changes. Use adjustable tracks and shims to fine-tune angles, and consult with local experts or retailers for guidance based on your goals and typical riding spots.

Conclusion:

A well-tuned foiling board setup is the foundation of a successful foiling experience. In a country like New Zealand, with its unmatched variety of water conditions and passionate water sports community, getting your setup right allows you to explore further, ride longer, and progress faster.

Whether you’re aiming to carve waves off the Coromandel coast or cruise across Lake Wakatipu, take the time to understand and refine your foiling board setup.

Tips for Buying a Gravel Bike

If you are in the market for a gravel bike, you should know that there are some things you should consider before you make your purchase. From gearing ratios to the material of the frame, there are many factors to consider when you are in the market for a new bike.

Wider tires provide stability on the trail

When it comes to tyres on Pushbikes gravel bikes NZ, you want to choose the right size. Gravel bikes are built for off-road riding, and wider tires help provide stability on the trail.

Pushbikes gravel bikes NZMany gravel bikes also have a longer wheelbase than road bikes. It gives them greater stability at speed and a larger turning radius. In turn, this allows them to handle a variety of terrain better.
Compared to mountain bikes, gravel bikes have a more relaxed geometry, which makes them easier to ride. They also feature more tyre clearance, allowing room for wide tyres and extra tread. These can provide additional traction on sand, dirt, and other abrasive surfaces.

Typically, gravel bikes have a shorter top tube and longer head tube angle, which puts the rider in an upright, more comfortable position. The slack head tube angle helps keep the bike from feeling twitchy, but it does not help as much when the bike is going fast.

A gravel bike can also have disc brakes instead of rim brakes. Disc brakes provide consistent stopping power in all conditions and better modulation.

A gravel bike is great for commuting or leisure riding on light trails. Its lighter weight and wider tyres give it an edge over a standard road bike.

Choosing the right tyres for your gravel bike can improve your comfort, balance, and riding performance. You can run a wide range of tyres, from 36 to 45 mm wide, at various pressures.

You may also want to consider whether you should purchase a tubeless tyre. Tubeless tyres reduce the risk of pinch flats and allow you to keep the tyre pressure low.

Gearing ratios determine how it feels to pedal

There is a wide range of gravel bikes on the market today. Some feature full suspension, while others are single-chainring mountain bikes. They’re suitable for riding off-road, for utility, and even for recreation. But the gearing of these bikes can vary widely. It can make choosing one confusing.

The first step is to figure out what you want your bike to do. Whether you’re a serious commuter, a recreational rider, or a multi-day off-road enthusiast, you’ll want to choose a bike that fits your needs. It would be best if you also kept in mind that your choice of gravel drivetrain will be a personal choice. For example, you may prefer a higher gear ratio for climbing or a lower gear for descending.

Gearing ratios are a key factor in how it feels to pedal gravel bikes. In general, a lower gear ratio gives easier pedalling. However, you’ll need to ensure that the gearing is appropriate for the terrain and riding conditions you expect to encounter.

On the other hand, a higher gear can increase your cruising speed and help you maintain balance. However, you’ll likely need to spend more time in the lowest gears on climbs.

One option for a gravel bike is to choose a double chainset. It allows you to change between a smaller ring for steep climbing and a larger one for fast descents. Another option is to choose a wide-range cassette, which can deliver the same range as a single-chainring system.

Gravel-specific GRX groupsets are available from Shimano. These include 48/31t double chainsets and 46/30t double chainsets.

Another option is the SRAM XPLR groupset, which includes a 10-44t cassette. The company also offers 12-speed wireless gearing options.

An aluminium frame with carbon forks and a seat tube is a good compromise. There are many different choices available when it comes to gravel bikes. The key is to find the bike that best suits your needs. You want to ensure it’s not too heavy or too stiff.

Gravel bikes differ from road bikes in several important ways. First, they have a more upright stance. Second, they usually have a shorter top tube, and lastly, they are less aggressive.

An aluminium frame and carbon fork combination is a good compromise if you’re looking for a gravel bike. Aluminium is light and affordable and can handle some impacts. However, it’s not as durable as a carbon frame.

It can also be difficult to repair. If you do break your frame, it’s expensive to replace.

On the other hand, a good aluminium frame can last for many years. A good aluminium frame is also cheaper to produce.

Carbon forks are available in a wide variety of features. For example, some feature eyelets for mounting cargo cages. These can balance the rider’s weight and increase the gravel bike’s versatility.

Although an aluminium frame and carbon fork combination can be the right choice for a low-weight rider, there’s still a lot to consider. Choosing the right frame for your riding style is a great way to improve your comfort and happiness on your next gravel ride.

Carbon fibre is a good material for gravel bikes because it’s lightweight and strong. It is one of the reasons that some manufacturers pair carbon forks with high-quality steel frames.

Although titanium is expensive and difficult to manufacture, it is strong and corrosion-resistant. Titanium is also dent-resistant, so it’s likely to last for your lifetime.

You can opt for the skeleton system if looking for the lightest pedals. Unlike the flat or trail pedals, a skeleton pedal doesn’t have a platform that extends around the cleat mechanism. But they are cheap, and you can clean them easily.

If you’re looking for more support, you can opt for a trail pedal. These have replaceable bearings, and they are more robust. Also, they have a small support area beneath the shoe.

What to Look For in a Raft and How to Buy Rafting Tools

Buying a raft is an exciting experience, but the process can be intimidating. If you’ve never rafted before, this article will help you understand what to look for in a raft and other rafting tools. In addition to rafts, you’ll want to purchase a life jacket, repair your raft, and learn how to buy rafting tools. Read on to discover the basics.

Buying a raft

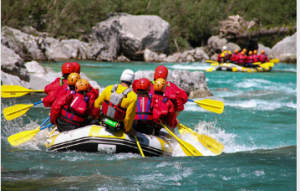
raftingBefore buying a rafting tool, you should decide on its purpose. There are different types and sizes of rafts, just as there are different types of cars. For example, there are vehicles for skiing, racing, snowmobiling, and rafting trucks. Consider where you’re going and the type of water you’ll be paddling in. For instance, a technical stream will require a different kind of raft than a flowing, high-volume stream.

Buying a brand new raft may not be wise for beginners. Instead, check Craigslist and local raft swap forums for used rafts. Also, consider buying a used raft from a store. You can find one for a fraction of its original cost by buying a second-hand model. The price will also depend on the type of raft and its condition. You can buy a used model if you’re planning on rafting only occasionally.

Before buying a used raft, make sure you check the condition of the item. You’ll want to ensure it’s in good condition and cracks-free. Rough spots can be a sign that cracks are coming. A pinhole leak will cause foamy bubbles, which can be hard to repair. While the price is low, you’ll find it well worth the price.

When buying a raft, you should consider whether it’s durable enough to handle the raging waters. Check for a brand built to last for years or check the warranty. Some rafts are better than others, so make sure you buy a sturdy one if possible. There are many types of rafts available in the market. You can check them on the internet.

Buying rafting tools

Buying rafting tools online can be an easy and affordable way to buy equipment for your next rafting trip. Regarding equipment, rafting is expensive, and you don’t want to have too many items. Purchasing used equipment from a reputable seller will help you get a good deal and minimize waste. It can also extend the life of the equipment. Buyers want to buy used gear that looks great and functions well.

When you buy a raft, check the thwarts and the cross-pieces. These pieces provide rigidity and support, so look for ones with fewer patches. Also, check the thwart-to-tube binding system. Next, check whether or not the thwarts can be removed without ripping the raft. Then look for a self-bailing floor, which will be buoyant above water level. Finally, check that it has pressure relief, protecting the floor while carrying the boat.

Before buying a raft, learn as much as you can about the material. If you’re new to the sport, buy a raft compatible with your skill level. A good raft will be comfortable for both you and your partner. Remember that it’s not a necessity to buy the most expensive one available. It’s better to start small and build a little experience before investing in the best rafting equipment.

When buying rafting tools, check the brand and model of the paddles and life jackets. If you don’t want to spend much on the purchase, consider renting the equipment. Life jackets should be explicitly designed for whitewater rafting. Some rafting outfitters carry used rafts, which are well-vetted to be safe. You can also look for used rafts at an outfitter.

Repairing a raft

When purchasing rafting tools, it’s helpful to consider the tools you’ll need to repair a leak. Different materials require different repair methods. Here’s a guide for you. The first three steps include preparing the area, assessing the hole size, and measuring the patch. Depending on the hole size, repair tape may be sufficient, while larger holes will require a more permanent repair.

While glue can be used for on-river repairs, it can be challenging to store in a raft repair kit. Tear-Aid or Tyvek are suitable materials for patching a tear, but they should be kept from chemicals. If a tear is small, you can use the same adhesive as before, although it may not hold well if you’ve already applied the patch.